Installation
Learn about how to download, set-up and start using Flex Design System.
Step 1
After purchasing Flex Design System, you will receive an order confirmation email containing a link to download the ZIP file.
Each order includes up to three download attempts. Every time the ZIP file is downloaded, the remaining download count is reduced.
Your licence key is used only to verify access to the download. It does not need to be entered into Figma or used during the installation process.
If you experience any issues accessing your download, please get in touch and we’ll be happy to help.

Step 2
Once you have downloaded the ZIP file, locate and unzip it on your computer.

Step 3
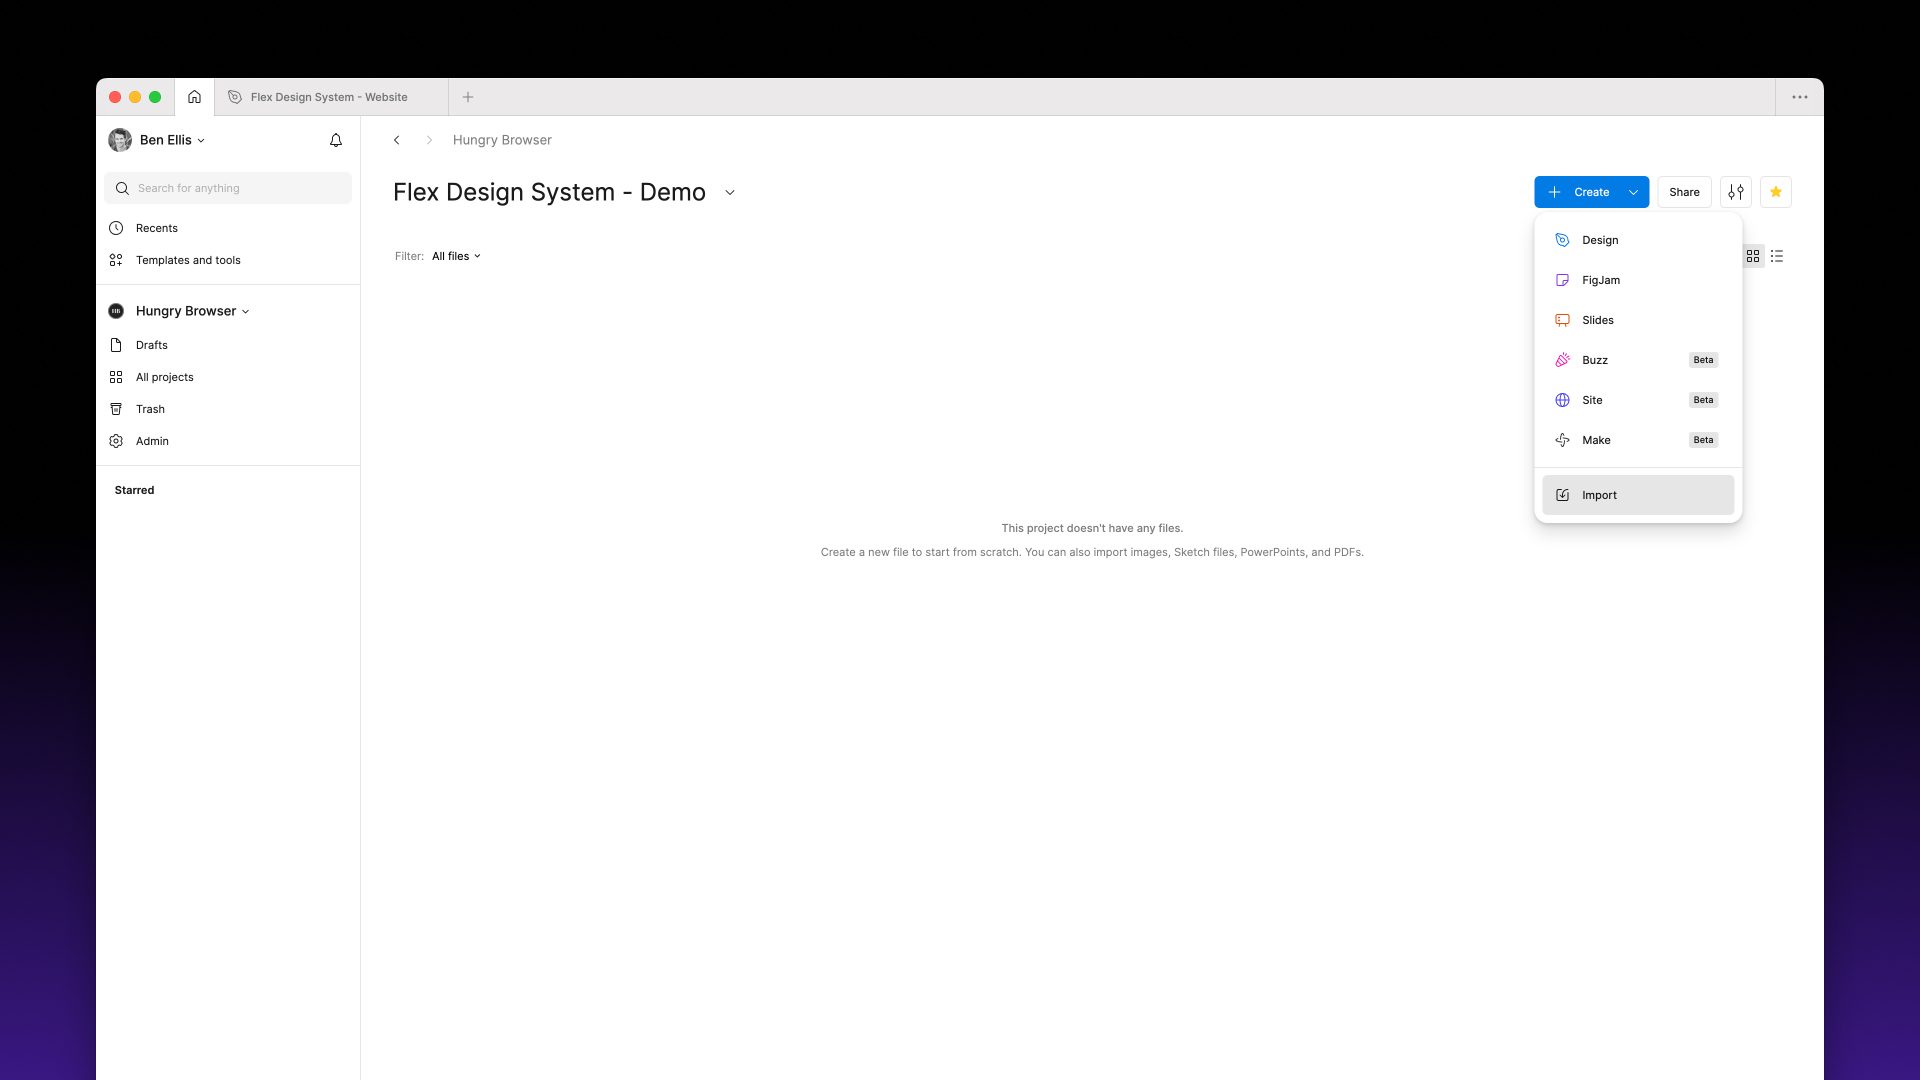
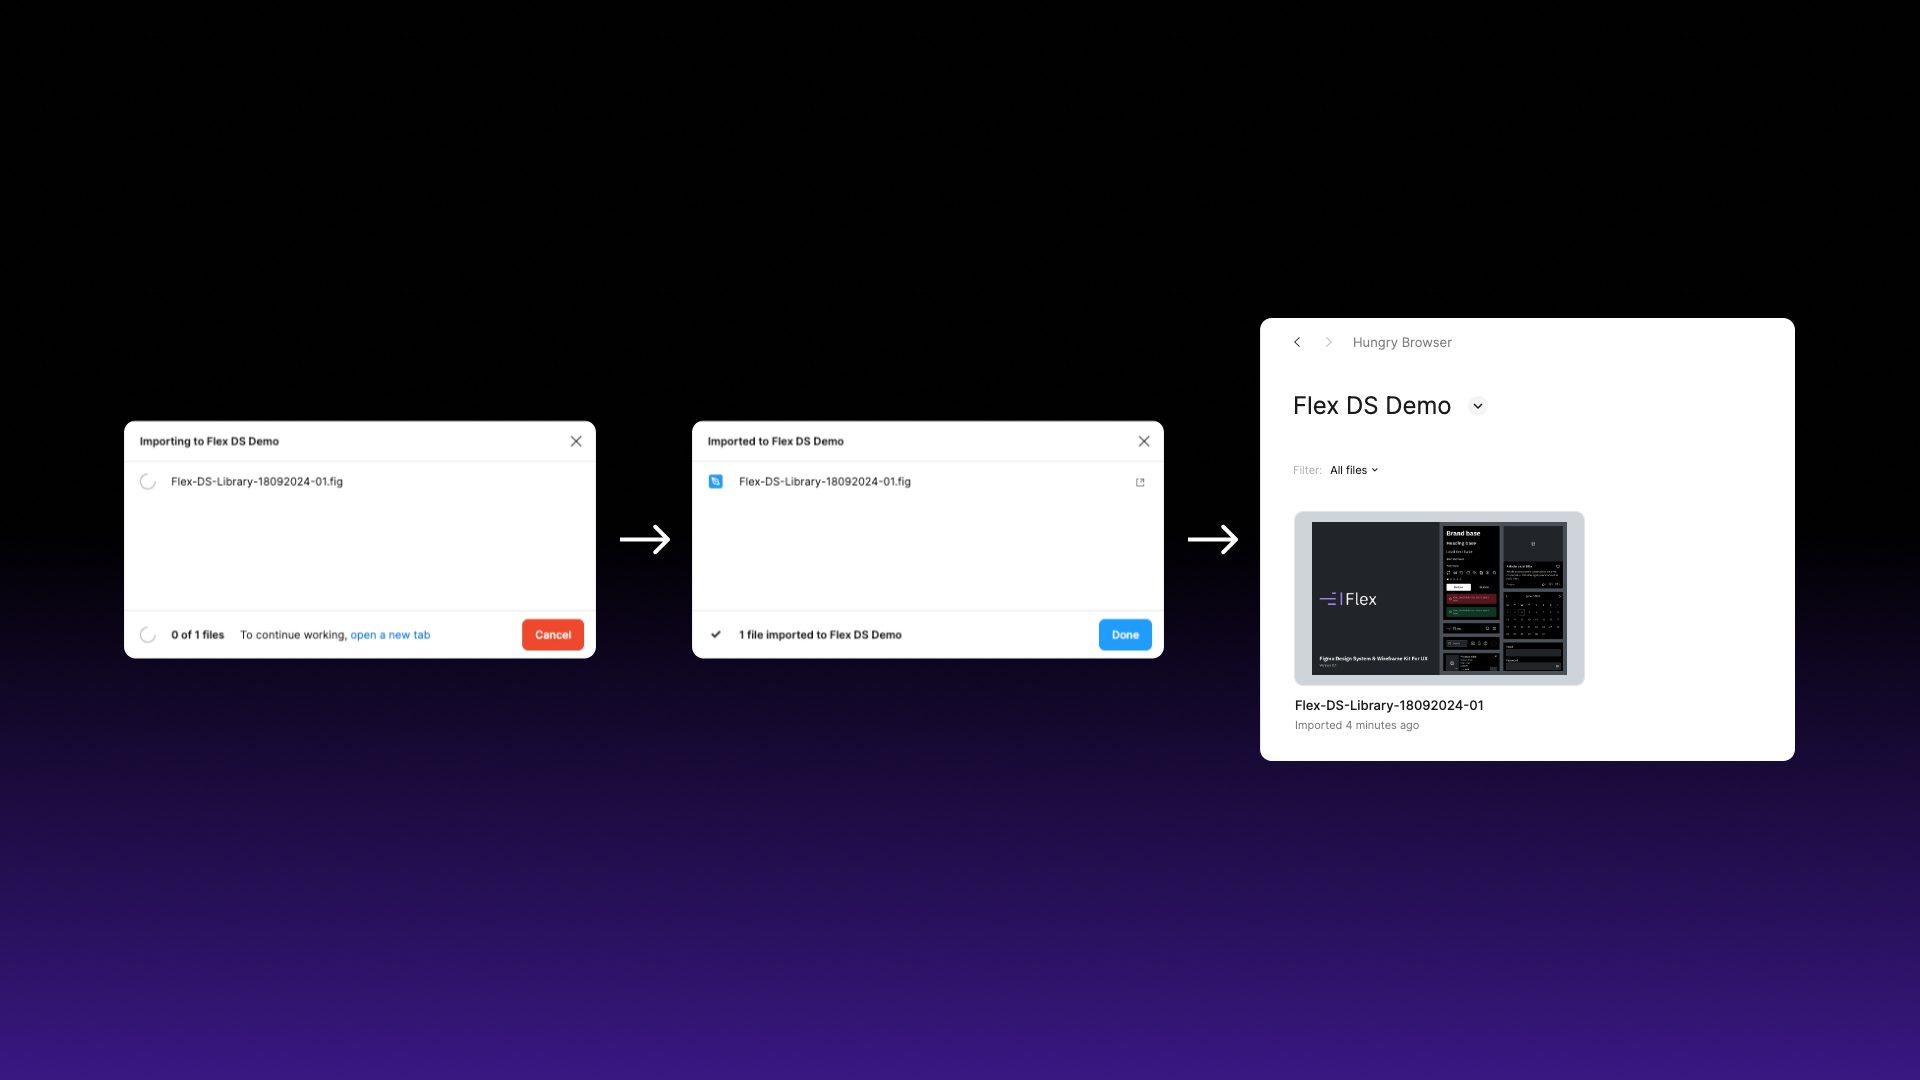
Ensure you have Figma open and navigate to the home screen (house icon). Select the ‘Create’ button and then import, or drag the .FIG file from your computer’s file browser into Figma.
Step 4
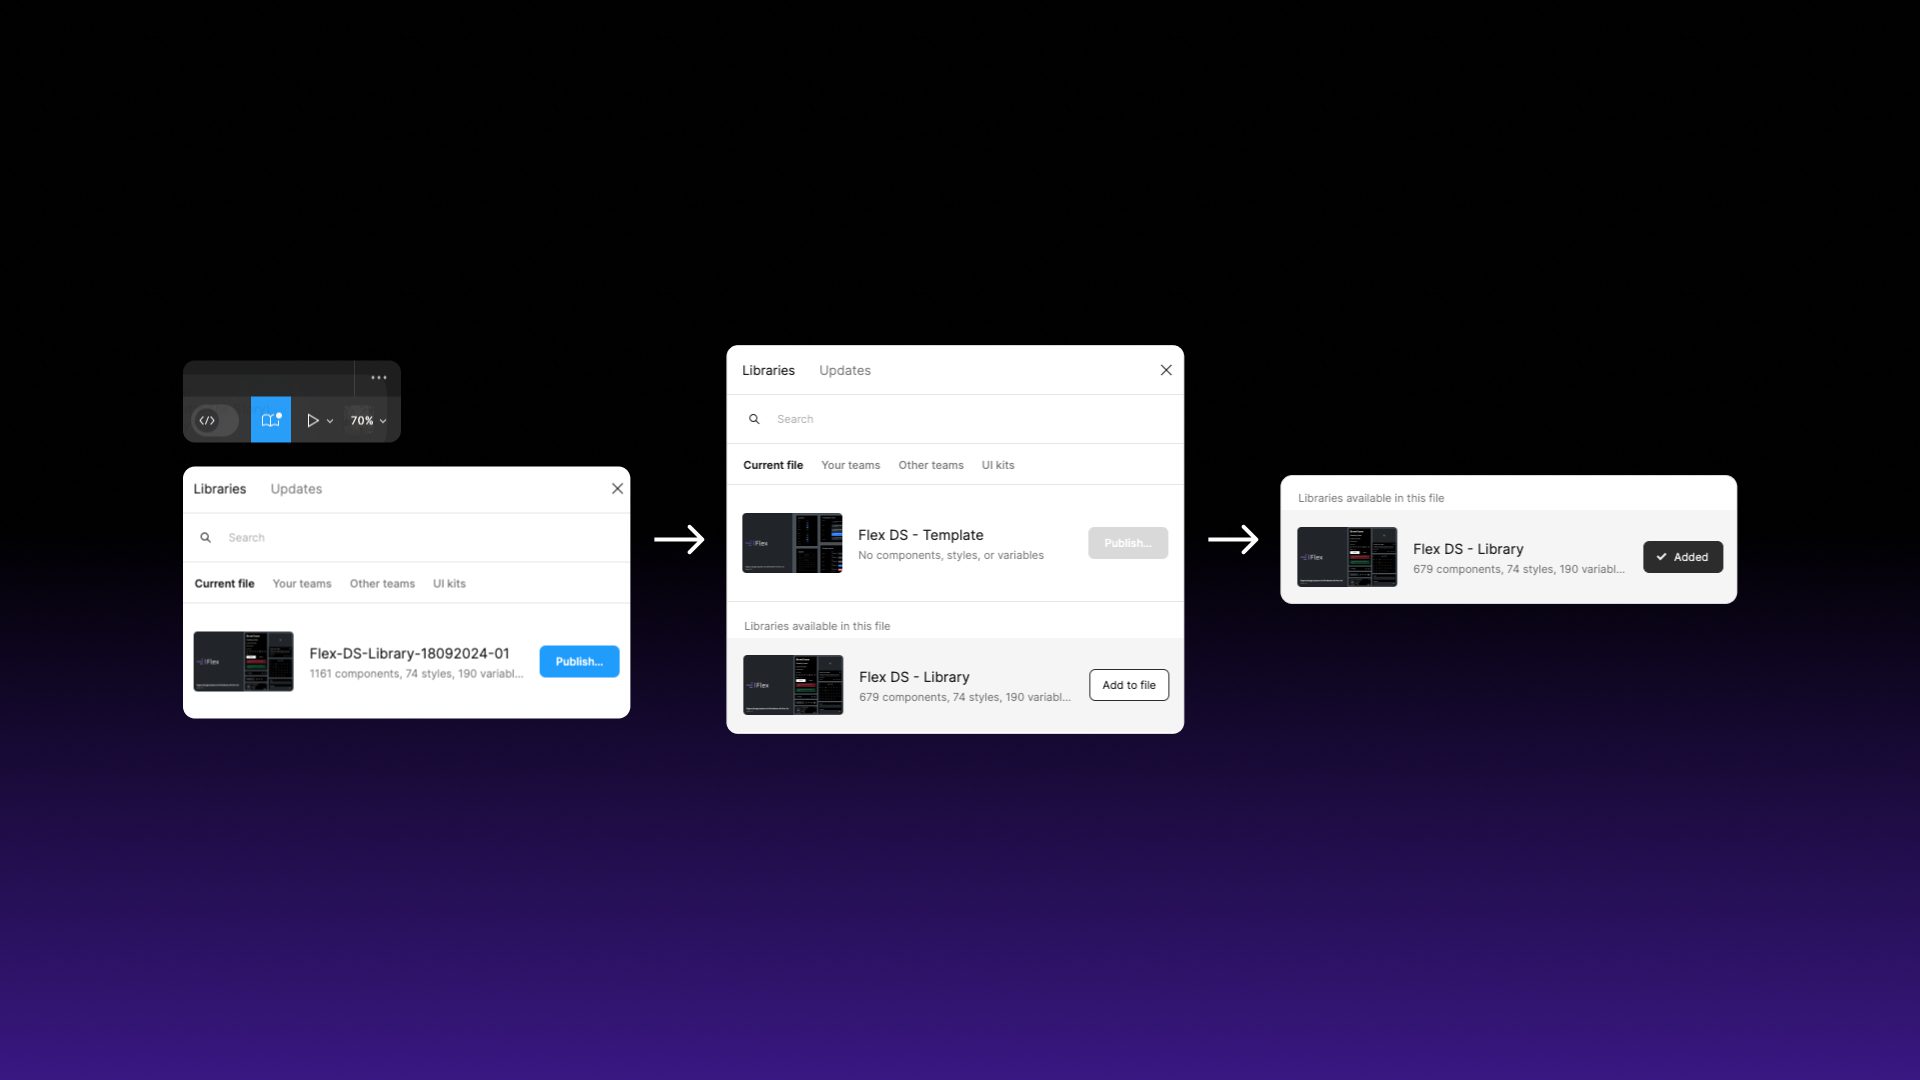
Once imported, open the newly added Figma file and select the Libraries tab and select Publish. Depending on the speed of your internet connection, it might take a few minutes to upload.
Step 5
Create a new Figma design file and select the Libraries tab. This will enable Flex Design System as a library.
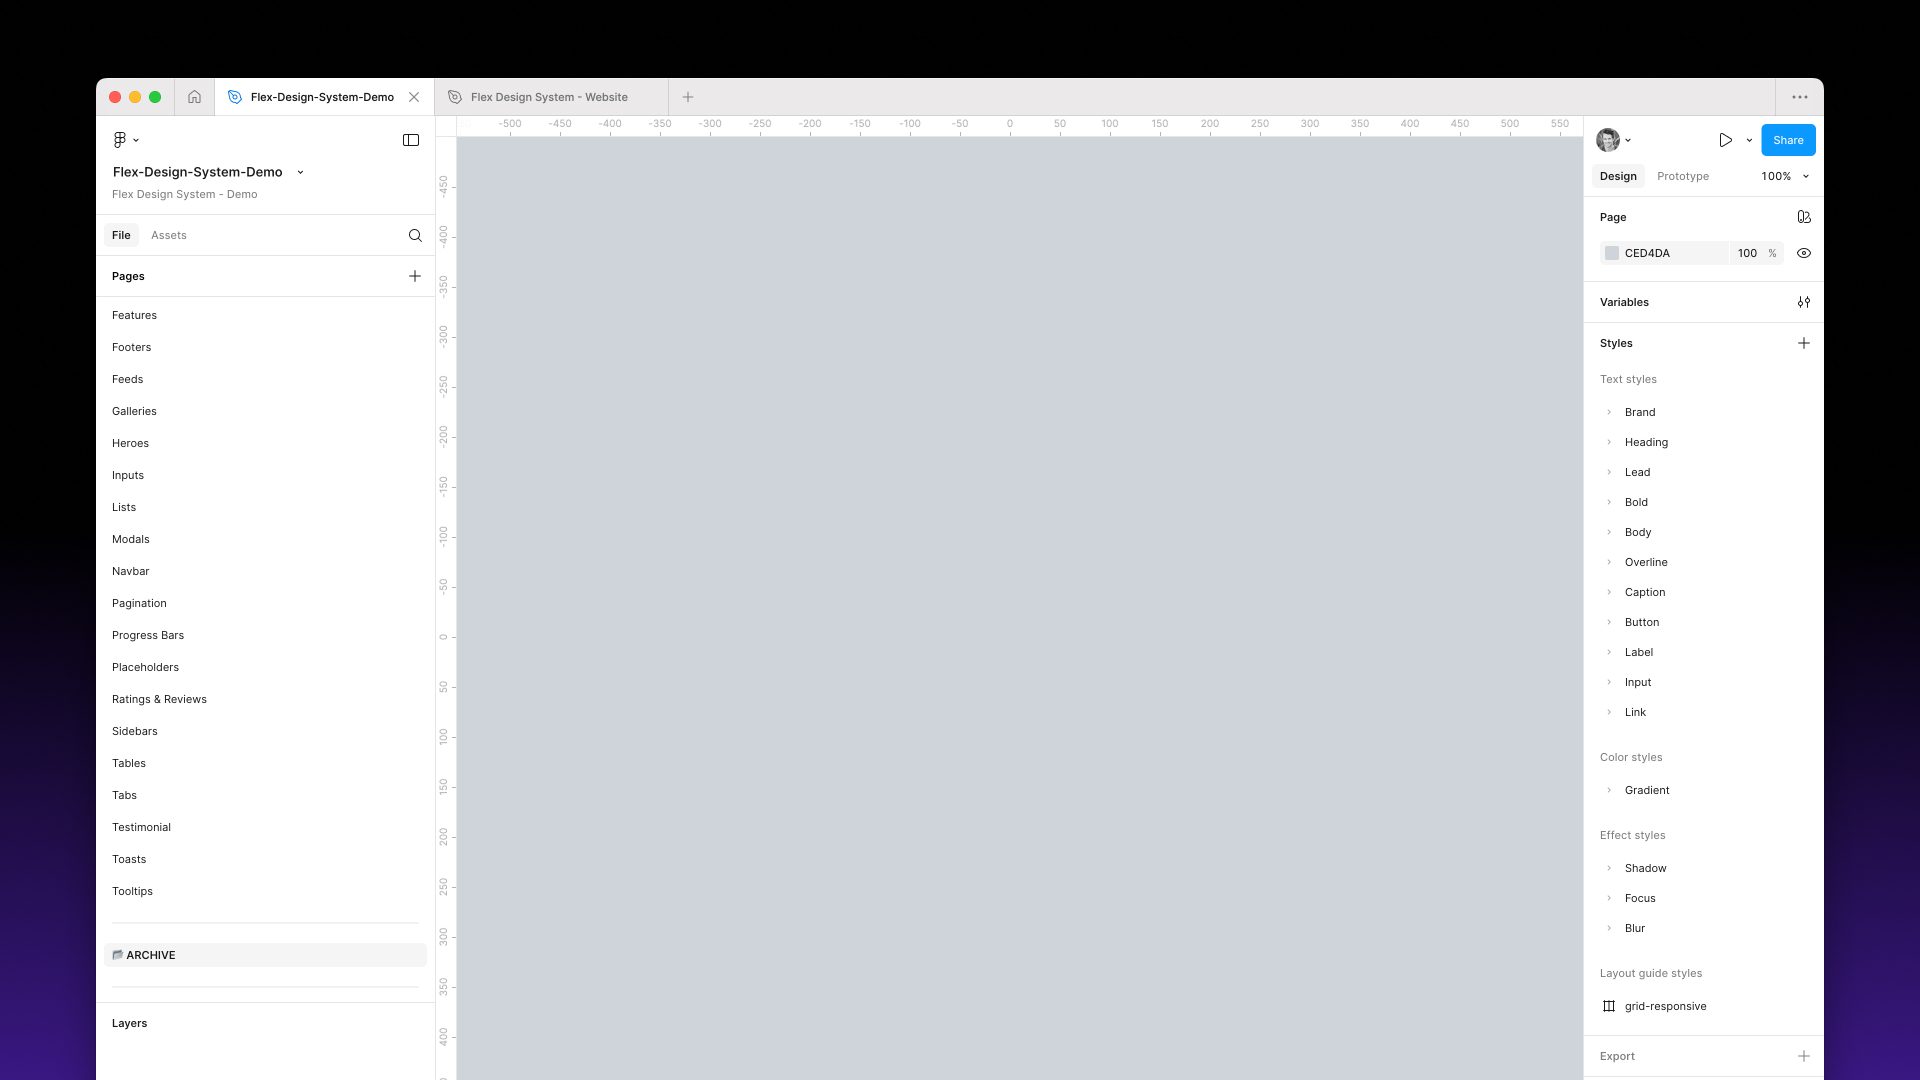
Step 6
You should now see a list of components in the Assets tab and can now start using them in your project.